I’ve been editing podcasts in Logic for a few years, but have only recently learned a few tips that made me realize I’ve essentially been doing it wrong the whole time. I’m sure Logic veterans will smack their heads reading these, but for anyone new to producing podcasts with Logic, they might be great time (and frustration) savers.
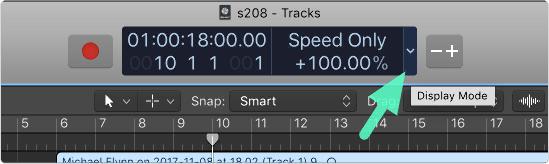
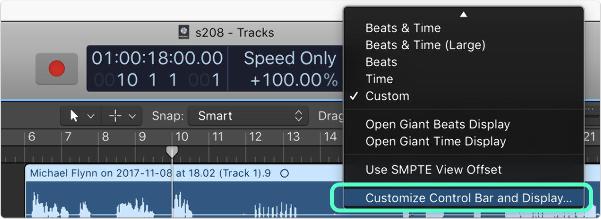
There are a lot of things in the control bar (top of the window, where the time/tempo are) that you’ll never need when editing podcasts. Things like BPM, for example. You can clean it up significantly by using the dropdown on the right of the “LCD” display and choosing Customize Control Bar and Display….
Note that you can have different “screensets” for different types of recording/editing. Use 1—4 to switch between them. Pick a placeholder (or create a new one) to set up for podcast editing, then once you’re done customizing, choose Save as Defaults. Then you won’t lose your “normal” control bar in the process.
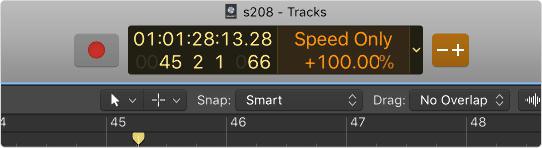
I’ve trimmed mine down to just what you see below. I use keyboard shortcuts for almost every button on the control bar, so there’s really no point in having them.
Note the Varispeed option under the LCD section…
Varispeed
Varispeed is a feature I didn’t realize existed until recently, but had always wished for. It lets you speed up the audio playback so you can basically listen through your podcast at 2x while editing.
Once the toolbar item is enabled, just use ⌃F (Control-F) to toggle it on and off. (I think that’s the default, but I might have edited that one. We’ll get to that below.)
Once it’s up, ensure that the type is set to Speed Only (click the top line for a menu), then double click on the percentage to edit it anywhere between -50% and 100% (100% being double normal playback speed). While playing back you can just hit the shortcut to speed up and then toggle it back off to return to normal speed. Scrubbing!
Removing Silence
I only use this one when there are issues with background noise. It’s most helpful when you’re trying to put together more than two participants, but even when there’s just a microphone picking up too much ambient noise, it removes all the parts where the person isn’t talking.
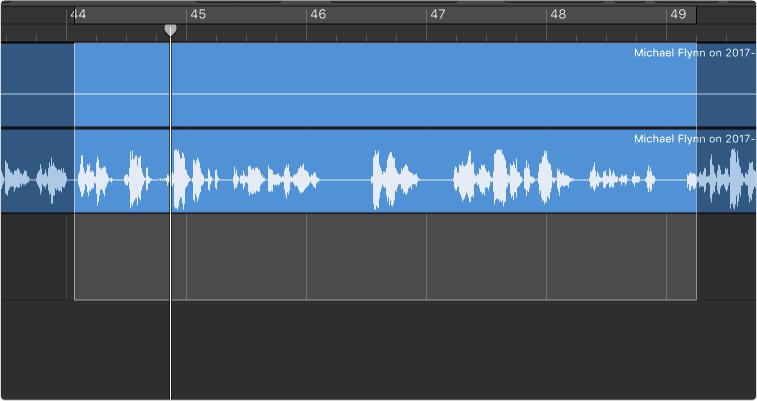
It doesn’t silence those parts, it actually cuts the sections out so you’re left with a few hundred small clips that are then easy to adjust left and right to fix talkover, etc. Jason Snell did a good writeup on this.
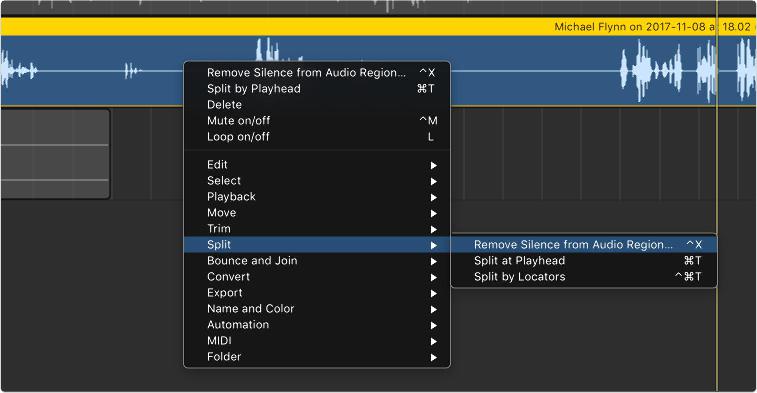
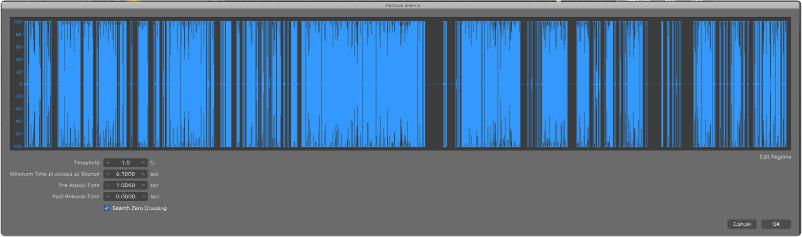
To use it, right click on an audio region and choose Split->Remove Silence from Audio Region. Or you can just select the clip and hit ⌃X.
Then you can adjust the settings for threshold and minimum length to get the results you need. Generally a threshold of 1.0 and a minimum length of 0.1 work for me.
Key Commands
If you want to edit quickly, you really have to learn as many keyboard shortcuts as possible. You can see everything that’s assigned (and edit them) with Logic Pro X->Key Commands->Edit (or ⌥K).
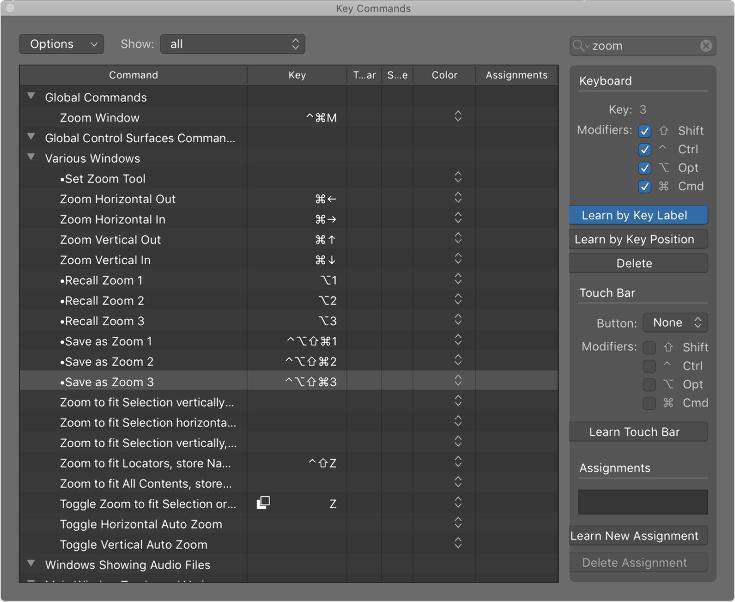
The first thing to learn is the zoom controls. Zooming out to jump around an hour or two of audio is a necessity, and zooming in to find edit points is something I do a lot. So learning the basic ⌘←/→ to zoom horizontally, and ⌘↑/↓ to zoom vertically is a must.
Logic can also store zoom presets. I changed these keybindings from their default to simple ⌥1, ⌥2, ⌥3 shortcuts. I left the shortcuts for saving the presets at the full ⌃⌥⇧⌘1 (etc.) because then I can just use my Hyper key to trigger them. Once that’s set up, you can zoom out and save that as preset 1, then zoom into a point where waveforms are clearly visible and save it as preset 2, then zoom all the way in to where you can actually pick out syllables and make that preset 3. Then just ⌥2 to do an edit and ⌥1 to jump back to a wider view.
Another handy assignment is the Delete and Move command. This is basically a ripple delete, and used in combination with the ⌘-Drag super select, it makes it dead simple to cut out an entire section and pull the ends together in one action. I assign ⌥⌘X to this. By default that combo inserts a new MIDI track, which is kind of useless here.
Templates and Presets
This will likely be obvious (and admittedly a practice of mine from the beginning), but creating a template for your podcast saves a ton of time on setup. This is especially true if you create or edit multiple podcasts.
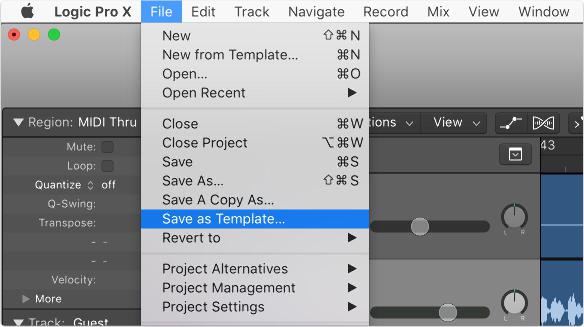
The easiest way to create a podcast template is to take one you’ve already edited. Delete all of the audio except for things like intro/outro music that are used in every episode. Be sure to clean the audio files out of the project library as well, or they’ll persist in every new episode and give you huge project files. Leave the plugin settings for voice tracks and any automation data for the intro/outro tracks in place, and Save as Template.
My templates only ever have two tracks, and I have them ordered in the way that Ecamm Call Recorder exports the two sides of a call. Then when I drag the files into the first track, I can select “Use Existing Tracks” and the right voices end up on tracks that already have the usual plugins and settings enabled.
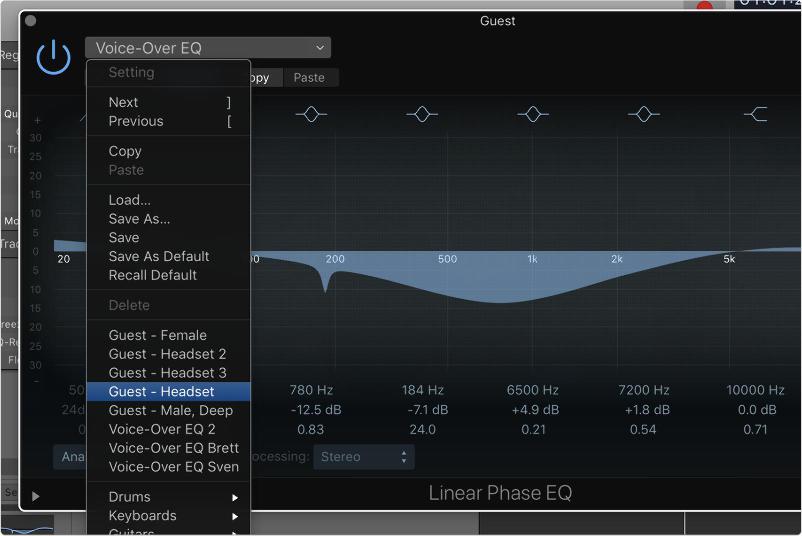
Any time I make significant alterations to EQ/Compressor settings, I save the preset with a name to describe what type of issue I was using it to deal with. Then I have a starting point if that need arises again.
I hope if you read this far that at least one of these tips was new to you. Happy editing, and keep an eye out for Aaron Dowd’s upcoming Logic course, it’ll be worth it!